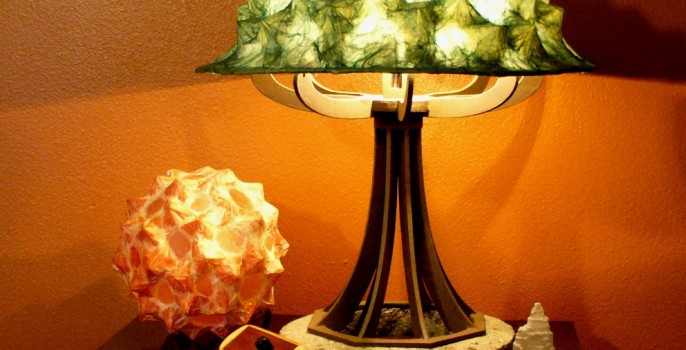
Roger Gano of Golden Heart Illuminations takes the art form of origami to a whole new level with his unique, handcrafted lanterns, lampshades and luminaries. These dramatic geometric pieces are surprisingly sturdy and suitable for any indoor environment.
Your lampshades and lanterns are like large-scale origami. Can you share your inspiration?
I grew up in Japan because my parents were missionaries. Paper gets a lot more respect there, and traditional paper making is a wonderful art form in itself. The word “origami” means folded paper in Japanese; I grew up folding boxes and cranes out of colored origami paper just like all the kids of my generation (before Nintendo I guess). The soccer ball design of the basic 90-unit sphere I use in my lanterns is just one of scores of complex designs called modular origami.
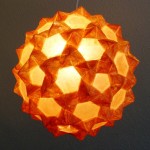 At first it was just an enjoyable challenge to make these things, but they’re generally fragile dust-collectors, and seem more valuable to the maker than anyone who might see them. Making these into functional lanterns was a practical extension of something I already enjoyed doing. While glue is generally considered cheating among origami purists, using paper mache to fill the pentagon and hexagon gaps within the makes a solid, remarkably sturdy sphere. Dangling a light bulb inside opened a world of creative expression and functionality to what is basically a cool geometric shape you can make with a bunch of pieces of paper.
What are your lanterns and shades made of?
I’ve found that parchment tracing paper – the sort you can get at any decent art store – is the strongest and most transparent paper readily available. I use a paper cutter to cut large sheets into the 3 to 5 inch squares that are folded into the linking modular units (actually I use rectangles that are three-fourths of a square to conserve paper and increase transparency). I gently paint the folded skeleton with my glue solution while layering delicate pieces of shoji paper.
So far my best glue mixture is one part Titebond II woodworkers glue to 3 or 4 parts hot water. Color can be added directly to the glue solution mixed with denatured alcohol as needed. At first I was using ink from computer printer refill kits, but now I use liquid aniline dye sold to woodworkers for tinting wood finishes. Pigmented colors in acrylic paint or Mixol colorants also work but they’re opaque and darken the lanterns more than I like.
How did you learn to make the lampshades? Did you attempt any failed items in the process?
I love experimenting with new ways to do things and using common materials in original ways. The first obstacle working with paper is that it turns to mush when it gets wet! The parchment tracing paper I use stays fairly strong even when wet but doesn’t have a plastic coating that resists the penetration of glue and dye. I use rubber punching balloons inside the globes to hold a spherical shape while adding glue and tissue paper.
It’s a constant challenge to inflate the balloon enough to stretch the paper skeleton into a sphere, but not so much to have a blow out. It’s also nerve-racking when the balloon is deflated once the paper’s dry – often the balloons stick to the paper asymmetrically and they can rip the paper when they pop.
On the smaller globes sometimes the balloon just sits there fused to the paper even after the pressure is released and I feel like a surgeon teasing away the rubber from the paper from a 3/4 inch opening.
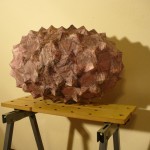 One time I tried making a capsule-shaped form using two balloons; I went very slow letting it dry in stages but it started dilating in the middle more like a football and finally ripped. I kept it since it has like 180 units and I spent a couple days making it but it’s not very appealing… I call it “E. coli” but you can decide for yourself.
In addition to the lampshades and lanterns, you also create lamps. Do you have any formal training?
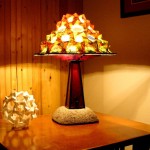 I’ve owned two houses and am a consummate handyman, but my only teacher was Time Life Books and trade magazines. I’ve done a fair amount of construction and fine woodworking but really can’t afford good tools nor quality hardwoods. My favorite tools are Japanese bimetal chisels and some antique handplanes I’ve refurbished and tuned – they hold blades flat and firm much better than the junk with plastic knobs sold today.
Can we get a sneak peek of any items not yet in the Etsy shop?
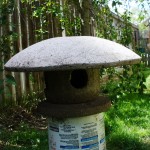 I have a box of solid bamboo floorboards I’m going to chop up and bend into all sorts of new and interesting shapes, but right now they’re mostly still in the box! With the summer weather I’ve been spending more time outside working with concrete and may try some outdoor lighting fixtures with weatherproof epoxy on paper on wood and light weight concrete lamps.
I imagine that shipping is quite a challenge. How do you protect the works for shipping?
I’d like to emphasize that these lanterns and shades are not delicate. The lanterns and shades are made with woodworker’s glue – not paste or typical white paper glue – and by weight there is more glue than paper. As stated in the Etsy descriptions, the globes can be bounced like basketballs. Here’s a video of a typical globe being slammed on the floor and set on fire to illustrate its heat tolerance.
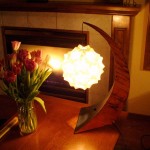
The question of shipping is an important consideration however, and I’m more concerned about the wood lamps being damaged than the globes. The crescent-shaped lamp stands are also quite large, and I’m in the process of making smaller lamps that still have the same shape and function.
I love the Hot Air Balloon Luminary Sculpture. Does this item have a story?
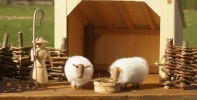
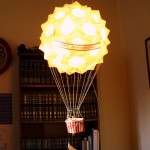 Aside from this being an actual anniversary present, most of my lantern embellishments are designed to attract attention and interest in the lanterns themselves. The light from these lanterns is quite lovely and it’s challenging to get photographs to accurately illustrate their glow.
How many hours goes into each piece?
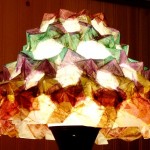
Actually cutting and folding the individual origami units takes the most time. It takes me about 3 hours to make a 90 unit spherical skeleton. Curiously, it doesn’t really matter whether the globes are large or small, it’s the number of units that determines the time. I’ve not talked much about the lamp shades, but they have over 100 units as well, and they take a bit more time once I’m gluing and layering paper because I put another pure white layer on the inside to reflect light and embed a cotton cord within the margin.
Each lantern and shade has at least two layers of paper which needs to dry overnight after each coat. I spent a lot of time making the lamp base for my Craftsman Style lamp but much of that was because I was making wooden jigs to allow making a large number of units in a small amount of time.
I don’t have spray equipment so all the finishes are done by hand. Like any production woodworking project, the first one takes ten times as long as the third, and in the case of the curved crescent lamp stands the first took 20 times as long with many total disasters. Clamping round or curved forms that are being glued under tension is a challenge under any circumstance, but now that I have the technique down, cutting the pieces on the band saw takes as much time as the glue up.
What led you to begin selling on Etsy? Have you sold at other venues?
I think its great to utilize the world wide web to display and sell hand crafts. I’ve enjoyed exchanging thoughts and compliments with crafts people from all over the world and Etsy makes it easy to enter into this arena. There are some local crafts fairs near Christmas time I’m gearing up for, and I’m looking into some direct mailing and face to face marketing in home décor boutiques in the Pacific Northwest. Everyone I’ve shown my lamps to in person is impressed with the quality of the light, and I’m confident there are some shop keepers who would be interested once they saw them in person.
I am confident that is true Roger, and I wish you the best of luck.
If you are a fan of Roger’s unique handcrafted lamps, shades, lanterns and luminaries, you can check out more of his work at his Etsy shop.
Get my latest articles straight to your inbox about once a month. Discover new artists, get a look behind the scenes, and learn the secrets of selling on Etsy.
« Friday’s Fast Five: Photos I Friday’s Fast Five: Tagging »


