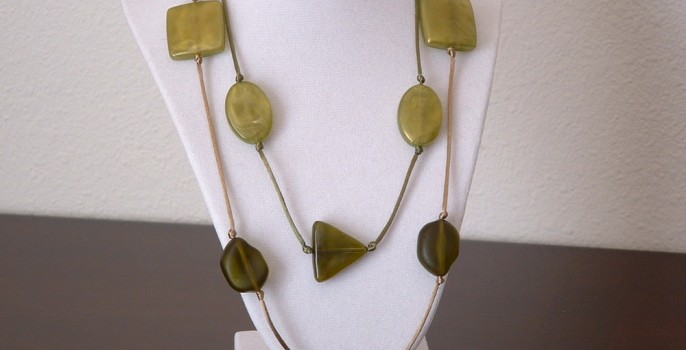
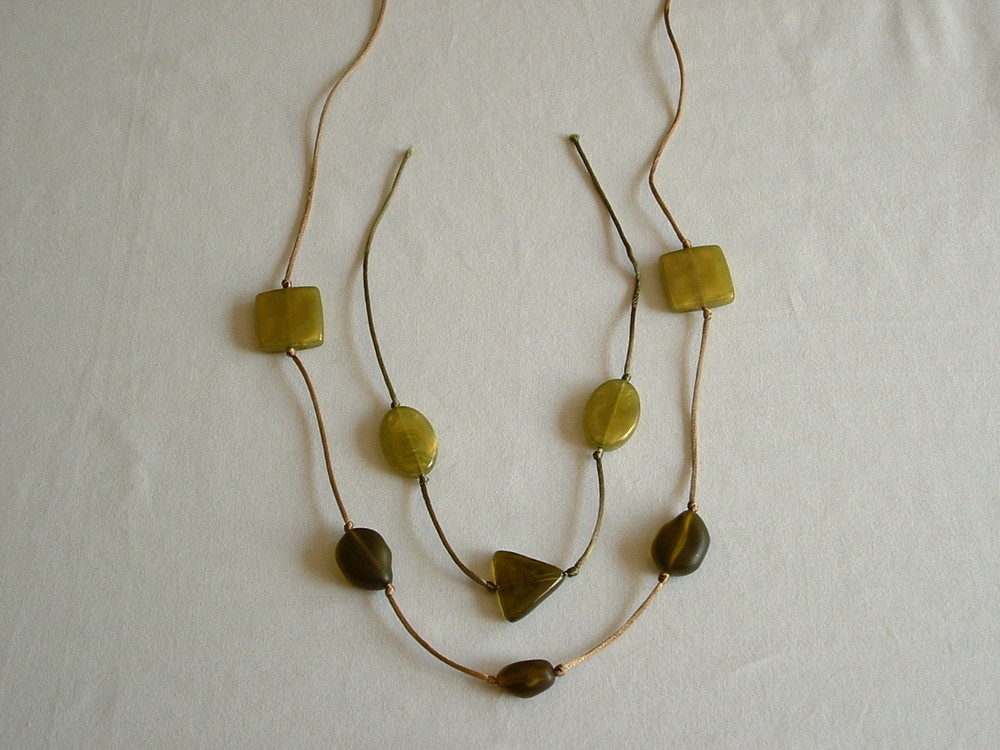
Create this beaded cord necklace in 15 minutes for $5. You heard me, this necklace is super easy to make, fun and affordable. I am always searching for a last minute gift for a friend – this fits the bill to a T. This necklace can be made by anyone – regardless of their jewelry making experience. No need to take a class, buy any expensive tools or supplies. This necklace is simple and inexpensive but doesn’t look that way.
Supplies needed:
- 8 assorted beads (I used acrylic beads, but you can also use glass)
- 5′ of leather, fabric or plastic cord (matching or complementary colors to your beads)
- 2 cord crimps to match necklace (I used antique brass)
- 2 open jump rings to match cord crimp
- Hook and eye clasp to match cord crimp
- Ruler
- Scissors
- Large paperclip
- Super Glue
- Flat nosed pliers
Instructions:
Step 1
Measure and cut:
1 piece of cord to 24″
1 piece of cord to 32″
*The necklace will not be this long but you’ll want some extra cord.
Step 2
Find the center-point of the 24″ cord and make a knot. String your first bead onto the cord. This bead will be the center bead for the shorter strand of your necklace. If you have trouble getting the cord through the bead, cut off a bit of the tip – this is why you have extra cord.
Step 3
Make your second knot as close to the bead as possible by holding the paperclip next to the bead while pulling the cord with your other hand.

Step 4
Measure two inches from the knot you just completed and make a third knot. String the second bead onto the cord and make a fourth knot using the paperclip.


Step 5
Flip necklace over, measure 2″ from your starter bead and make another knot. String a bead onto the cord and knot using the paperclip to complete the short strand of the necklace.
Step 6
Find the center-point of the 32″ cord and make a knot. String your first bead onto the cord. This bead will be the center bead for the longer strand of your necklace.
Step 7
With the longer strand center bead in place, follow steps 3-5. At the end of this step, you should have a total of three beads on the long strand – a center bead and one bead on either side.
Step 8
After placing and knotting your last bead on the longer cord, measure 3″ and make a knot.

Place the final bead for this side and make a knot. Repeat on the other side.
Step 10
You should now have three beads on the short strand and five beads on the long strand.
Step 11
Measure 3″ from the final bead on the long cord and cut off any excess cord. Repeat on the other side.
Measure 5″ from the final bead on the short cord and cut off any excess cord. Repeat on the other side.
Step 12
Gather the ends of one short cord and one long cord from the right side of the necklace and place the ends of the cords onto your cord crimp. Add a dab of glue.
Step 13
Using pliers, close the crimp onto the cords. I find that it works best if you crimp one side down and then the other.


Step 14
Gather the ends of one short cord and one long cord from the left side of the necklace and place the ends of the cords onto your cord crimp. Add a dab of glue and repeat step 13.
Step 15
Open a jump ring using pliers. Connect the hook clasp to the cord crimp using the open jump ring. Using pliers, close the jump ring. Open the second jump ring and connect the eye clasp to the other crimp cord using the second jump ring. Close the second jump with the pliers and you’re done!


You can use different beads and different configurations for a new look. Change the length of the necklace or the color of the cord to suite your taste – or to fit the style of the person you’re making it for. Now that you have the basics down, it’s a breeze.


3 Responses
Leave a Reply
« Etsy Relevancy Search Explained Friday’s Fast Five: Slow Summer Sales »
I love this necklace so much. It is perfect! I included it in my Mother’s Day Gift Tutorials post here:
http://freshjuniper.blogspot.com
Happy Mother’s Day!
This is really helpful but use beads instead!
In a word, WOW. Plus two: Thank you!